Blog · maintenance
The 7 Most Common Roof Leak Locations (And What Causes Them)
Flashing, pipe boots, valleys, skylights. Learn the seven spots where Nampa roofs leak first and how to spot trouble before it floods your attic.
We have spent over 22 years on roof repair work across more than 1,200 Canyon County homes.
Most property owners assume a leak means their actual shingles have failed.
The reality is quite different.
Our team routinely finds that the vast majority of these issues occur right where the roof meets another structure.
Let’s look at the data behind The 7 Most Common Roof Leak Locations (And What Causes Them) and explore practical ways to respond before water damages your home.
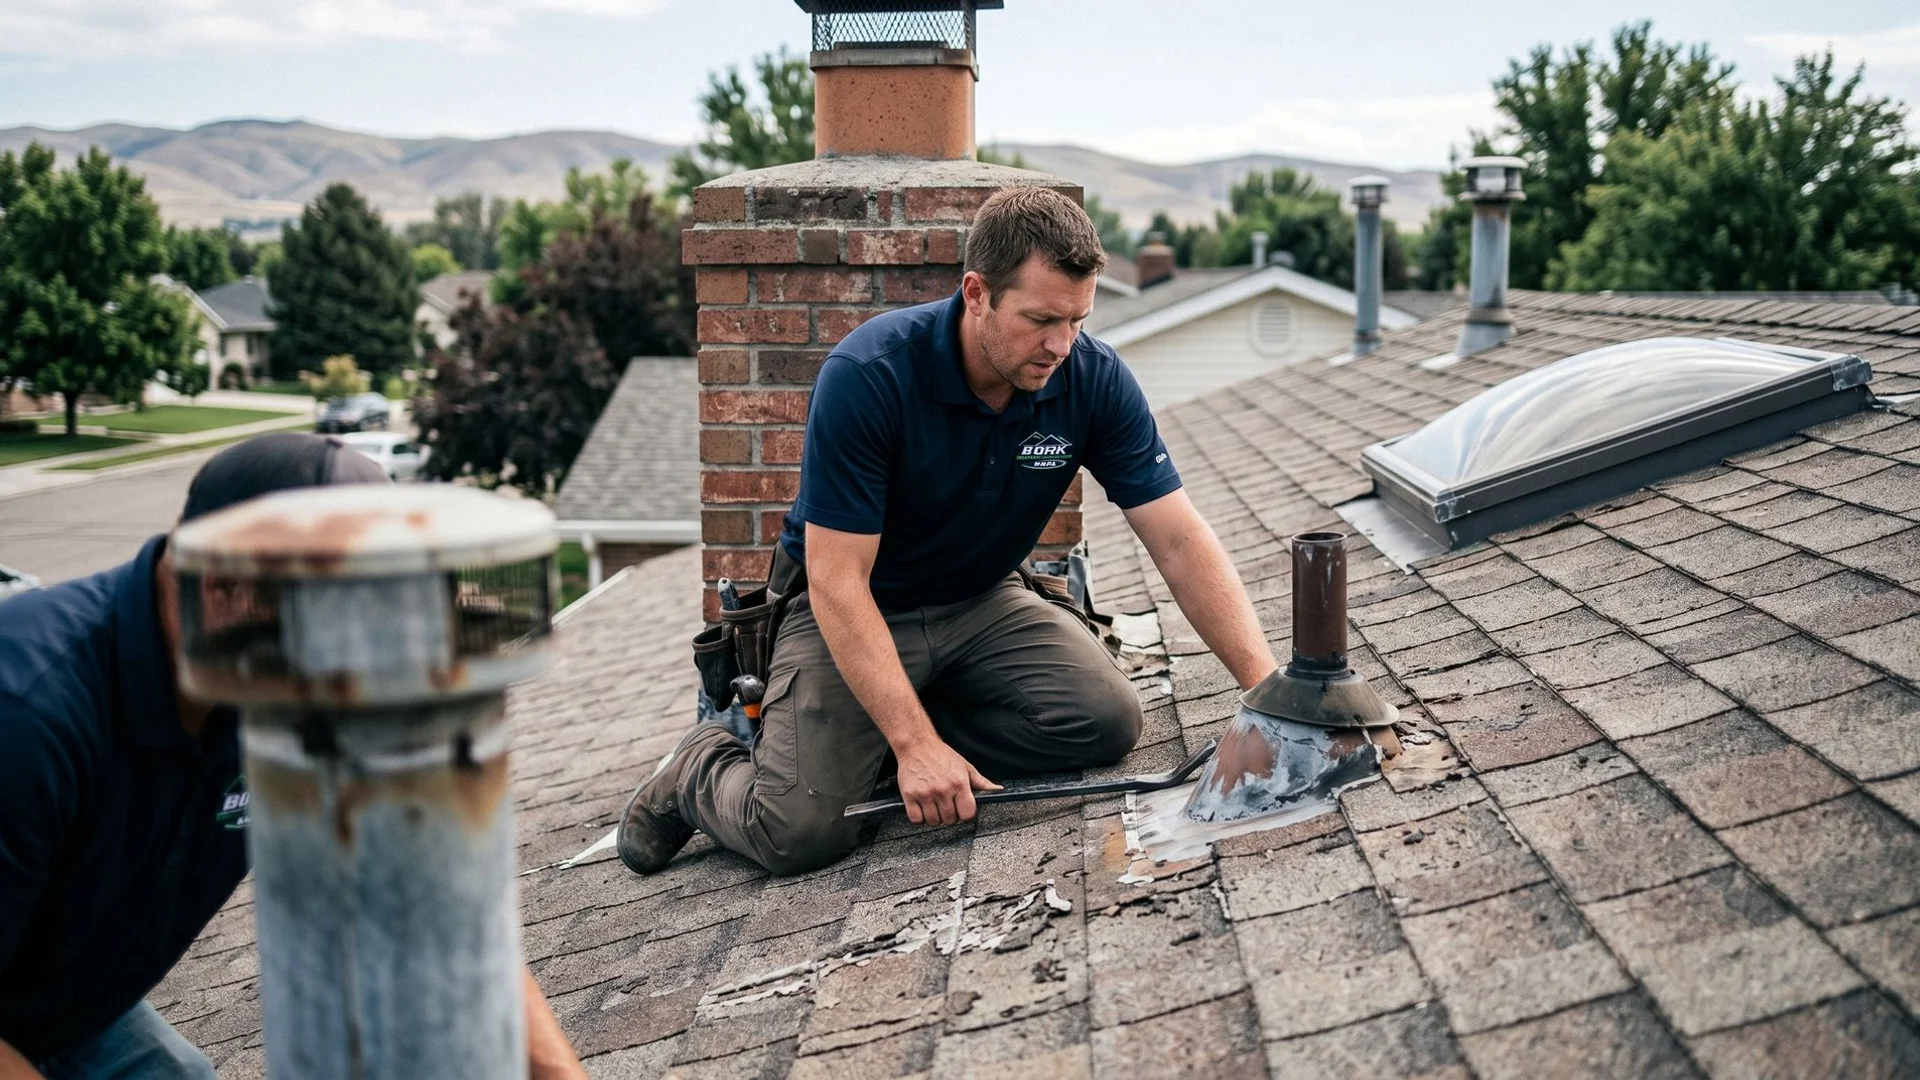
1. Failed Pipe Boots
This is the single most common leak source on residential roofs in Nampa.
Every plumbing vent stack that pokes through the roof has a rubber gasket called a boot sealed against it. Builders often use cheap neoprene rubber to save money during construction.
Our team routinely sees the problem with this approach. Intense sunlight cooks that rubber within 8 to 15 years, causing it to dry rot and crack right around the pipe. Your 30-year architectural shingles will outlast these cheap components by decades.
- Warning signs: A small ring of staining on a second-floor ceiling near a bathroom, kitchen, or laundry room.
- The true cause: Water slides directly down the exterior of the PVC pipe and drips onto the drywall below.
Choosing a Better Replacement
You must replace the entire boot with a high-quality alternative. Cheap caulk-only repairs almost always fail within a year or two.
We highly recommend upgrading the material during your next repair.
| Boot Material | Average Lifespan | UV Resistance |
|---|---|---|
| Neoprene Rubber | 8 to 15 Years | Low |
| Silicone Collar | 20+ Years | High |
| Lead Jack | 50+ Years | Extreme |
2. Chimney Flashing
Chimneys are notorious leak points because they are essentially large holes cut directly through your roof deck. Water flows heavily down the slope and collides with the back and sides of the masonry.
Our crews constantly replace flashing systems that were poorly installed the first time. The metal sealing the chimney to the roof has multiple components, and any single failure allows water inside.
Recent 2026 data shows that the national average cost to repair chimney flashing ranges from $400 to $1,600. Prices run even higher if the underlying masonry needs repointing.
- Warning signs: Wall stains on interior rooms adjacent to the chimney, or water pooling in the firebox.
- Common pitfall: Using roof cement or tar to patch a leak is a temporary bandage that will crack during the next freeze cycle.
Proper Rebuilding Techniques
You must rebuild the entire flashing system rather than patching the visible failure. Half-fixes here guarantee a costly callback.
We always ensure the repair includes all three necessary layers of protection.
- Base Flashing: Installed at the bottom junction where the chimney meets the shingles.
- Step Flashing: Small L-shaped metal pieces woven alternately with each shingle row up the sides.
- Counter-Flashing: Metal cut directly into the brick mortar joints and folded down over the step flashing.
3. Skylight Seals
Skylights add beautiful natural light and real value to any property. Every skylight also introduces another set of seams and factory seals to worry about.
Our experience shows that basic acrylic or plastic skylights typically fail within 7 to 10 years. Higher-end glass models from brands like Velux can easily last 20 to 30 years if properly maintained.
Intense temperature fluctuations cause the frames to expand and contract, eventually breaking the weather seal.
- Warning signs: Condensation between double-paned glass, or water dripping from the bottom interior edge.
- Common pitfall: Applying exterior caulk around a foggy skylight will not restore a broken factory seal.
When to Repair vs. Replace
Minor flashing leaks around the perimeter can often be resealed with a manufacturer flashing kit.
We advise clients to follow the 50 percent rule for older units. If the cost to re-flash and repair an aging skylight exceeds half the price of a full replacement, just install a new, energy-efficient model.
4. Valleys
A valley is the distinct V-shaped channel where two sloping roof planes intersect. Water concentrates heavily in these troughs during a storm.
The rate of wear on the shingles or metal liner here is far higher than on the open shingle field. Valleys easily catch leaves and pine needles, holding moisture directly against the roofing materials.
Current pricing for roof valley repair in 2026 averages between $400 and $2,000, depending on how much surrounding material must be removed.
- Warning signs: Visible wear or channeling along the valley line, missing shingle granules, or exposed fiberglass matting.
- The fix: Strip back the old shingles, replace any rotted decking, and install a fresh waterproof base layer.
Upgrading Your Valley Protection
We strongly suggest avoiding closed asphalt valleys in areas with heavy rain or snow.
Your contractor should install a 36-inch wide strip of heavy-duty underlayment centered straight down the trough.
| Valley Type | Description | Best For |
|---|---|---|
| Closed Valley | Shingles woven or cut across the intersection. | Steep pitches with light debris. |
| Metal W-Valley | A continuous piece of shaped metal lining the trough. | Heavy rain, snow, and high debris areas. |
5. Wall Step Flashing
Many roof planes meet a vertical wall, like the side of a dormer or a second-story addition. This critical connection must be sealed with step flashing.
Our repair technicians find that inexperienced roofers frequently use a single, long piece of continuous metal flashing here to save time. This is a massive mistake.
Continuous L-flashing allows water to easily run downhill underneath the metal and straight into your plywood decking.
- Warning signs: Stains running down the inside of an exterior wall on the upper floor.
- The fix: Pull back the siding and install correct step flashing, weaving small L-shaped metal brackets into each shingle course.
The Missing Kickout
Water flowing down a side wall will shoot straight past the gutter if not properly diverted.
We always check for a specialized piece of angled metal at the very bottom edge. This component, known as kickout flashing, acts like a funnel to force water safely into the gutter system.
Missing kickout flashing is the leading cause of rotted wall siding directly below the roofline.
6. Ridge Vents
Continuous ridge vents are a standard ventilation upgrade on modern properties. They allow hot, trapped attic air to escape through the very peak of the structure.
Our teams frequently see issues when these vents are installed incorrectly or damaged by severe weather. Heavy storms can blow rain horizontally straight into the attic space.
Premium models like the GAF Cobra Rigid Vent 3 are specifically tested to pass wind-driven rain tests at speeds up to 110 mph.
- Warning signs: Water stains at the very top of your attic insulation, directly below the center ridge.
- Common pitfall: Using cheap, rolled ridge vents without structural support often leads to compression and blocked airflow.
The Importance of External Baffles
You need a vent design that actively fights against severe weather.
We recommend installing hard plastic vents equipped with external baffles. These small, engineered ridges deflect wind over the top of the vent, creating a vacuum that pulls air out rather than pushing rain in.
7. Ice & Water Shield Failures At The Eaves
Ice and water shield is a self-adhering, rubberized membrane installed along the lowest edges of the roof. It provides a mandatory secondary barrier against winter ice dams.
Our inspectors often find older roofs where this membrane was installed far too narrowly. When snow melts and refreezes at the gutter line, the expanding ice forces water upward and under the shingles.
The International Residential Code (IRC) section R905.1.2 mandates strict coverage rules to prevent this exact failure for the climate zone Nampa sits in.
- Warning signs: Wintertime leaks along the top edge of an exterior wall, especially after a snowy week followed by a sudden thaw.
- The fix: Remove the lower courses of roofing and apply a compliant waterproof membrane directly to the bare wood.
Calculating Proper Coverage
You cannot simply roll out a single strip of shield and call it a day.
We follow strict building codes requiring the membrane to extend from the roof edge to a point at least 24 inches inside the warm interior wall line.
If your home features wide two-foot exterior overhangs, you actually need a minimum of four feet of shield extending up the slope to stay compliant and dry.
Catching The 7 Most Common Roof Leak Locations (And What Causes Them) Early
You do not need to climb a dangerous ladder to catch most of these problems early. Walk the perimeter of your home twice a year during spring and fall.
Our experts suggest grabbing a flashlight and checking a few specific target zones for the issues discussed in our guide to The 7 Most Common Roof Leak Locations (And What Causes Them).
Catching a minor drip today saves thousands in structural repairs tomorrow.
- The ceilings on every upper floor, checking near bathrooms, fireplaces, and skylights.
- The interior corners where exterior walls meet the ceiling.
- Your attic, focusing on the underside of the wood decking and around any visible pipes.
- Your gutters and downspouts for excessive shingle granule accumulation.
If you notice anything suspicious during your walkthrough, request a professional evaluation.
Call (208) 606-3193 to schedule your free inspection and protect your property.
Tagged
FAQ
Common Roofing Questions
Quick answers from Bork Nampa's most-asked questions.
How much does a roof replacement cost in Nampa?
+
How long does a roof replacement take?
+
Does Bork Nampa help with insurance claims?
+
What is the best roofing material for Nampa's climate?
+
Do I need a permit for a roof replacement in Nampa?
+
My Nampa home was built before 1978. Does that matter for roof work?
+
How do I know if my Nampa roof needs repair or full replacement?
+
When is the best time to replace a roof in Nampa?
+
Who is the best roofing contractor in Nampa?
+
How do I prevent ice dams on my Nampa roof?
+
Is metal roofing worth the cost in Canyon County?
+
What warranties does Bork Nampa offer?
+
Do you provide roofing in Caldwell, Middleton, and Kuna?
+
Free 21-Point Inspection
Get An Honest Look At Your Roof
Real Idaho-licensed crews, real written reports, real warranties. Schedule your free inspection today.